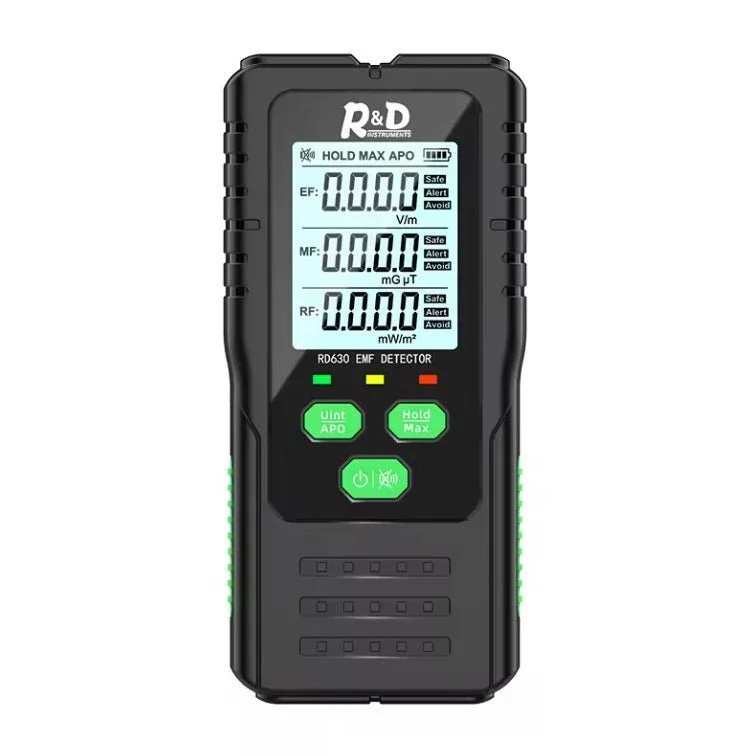
 Image 1 of 1
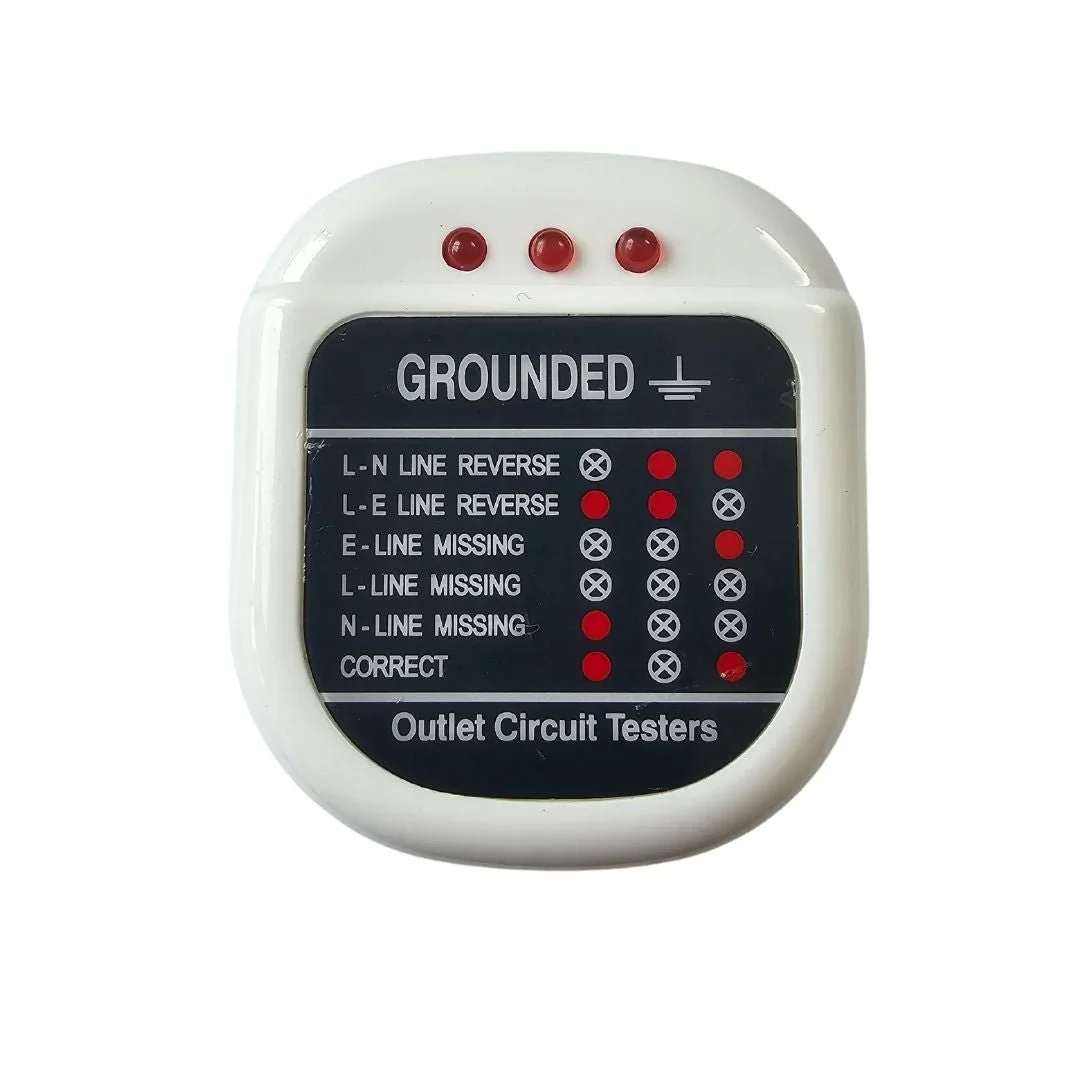
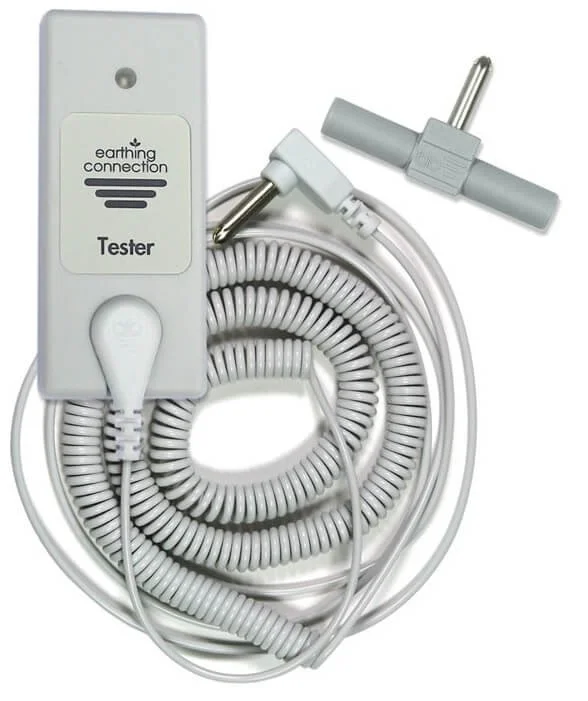
Each tester comes complete with a 6m coiled cord, a 2 into 1 splitter, and a user manual to guide you through the testing process. Keep your earthing system functioning at its best with the Earthing Conductivity Tester.
Instructions:
Checking the Tester Press button (1). The LED (2) should flash green and then go off. This indicates the tester is working and the battery is ok. If the LED doesn’t come on, it is time to change the battery - remove the four screws on the back to gain access. Testing your Earthing Product Connect your Earthing product to Earth. Snap another connection cord onto the tester (3) and connect to the same Earth. Most Earth Connection Plugs have two holes which will allow both connections. With some connection plugs or with a grounding rod kit, you may need to use the 2-to-1 splitter provided. Press the metal disc on the back of the tester onto the Earthing product: onto the silver lines on a sheet, the top surface of a mat, or the inside of a grounding band. The metal disc needs to be pressed firmly to the product to perform the test. Press and hold the button (1). The LED (2) should light green and stay lit while there is contact. This indicates everything is conducted correctly. If you get no result at first, try different areas of the product. Also, try a different connection cord if you have one